

Software installation.
Use the following instructions to install the edgeMED practice management application on a PC.

Software installation.
Use the following instructions to install the edgeMED practice management application on a PC.
Note: These instructions are not applicable to edgeMED’s web-based version of software which does not require any installation.
Software client update
If you already have edgeMED installed on your workstation and need to update your connection utility as instructed by an edgeMED product representative, please download the update. Once downloaded, please run the file to install it. Should you not have edgeMED presently installed on the particular workstation, please proceed to follow the below “Software installation instructions.”
Software installation instructions
To install edgeMED on a workstation for the first time, please follow these 7 steps to install the edgeMED software on a computer running the Microsoft Windows operating system.
Installation time: under 4 minutes
Find the software on an existing PC
Select the Start icon in the lower left corner of your desktop and then:
Select “All Programs”
Select the edgeMED Folder
Select edgeMED Configuration
Connection properties
You will be presented with the Connection Properties and select “Configure.”

Gather IP address and connection properties
Select the Transport tab and take note of the Server Name or IP Address (will be the same for all PC work stations).

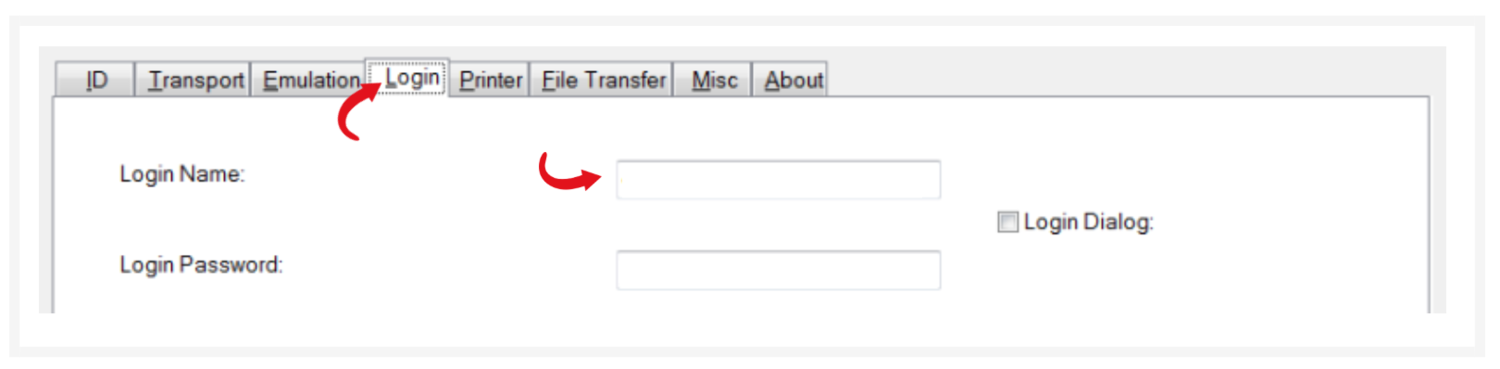
Login properties
Select the Login Tab and take note of the Login Name (will be the same for all PC work stations). You may now cancel and exit.
Download software
A. On the PC (running Microsoft Windows) you now wish to install edgeMED, install the software by selecting the below button.
B. A dialogue box will display asking you if you want to run this file. Select “Run” and the software will begin to download. If you encounter a message that asks you if you want to allow the following program to make changes to this computer, select “Yes.”
C. The Installation Wizard will open. Select Next > Next > Next > Finish.
Once installation is finished
Double-click the edgeMED icon (red arrows) on your desktop (opening the new edgeMED software). You will be prompted with the following two dialog boxes for which you will want to select “Yes” to both:
ATE Connection Properties stating the edgeMED profile not found: Select “Yes” to continue.
Import Configuration from File: Select “Yes” to limit access to current user.
Connection properties
A. Connection Properties window will open and select “Configure.”

B. Select the Transport tab and change Transport Type to SSH. Enter IP Address into “Server Name or IP” field (notated at the beginning of this process).

C. Select the Login tab and enter Login Name (this can be gathered from another edgeMED configuration).

D. Select “OK.”

E. Select “Connect.”

Complete
Once the installation is complete, the new edgeMED software will launch and land on the sign-in screen.