

edgeMED Help Center > Practice Management > Billing
Sliding fee schedule.
Sliding Fee Schedule
The sliding fee schedule lets you automatically calculate patient discounts based on patient salary ranges.

Select Utilities icon from the top left of the screen.
Click Preferences and Company Preferences.

Scroll down to Enable Sliding Fee, and change the drop-down to Yes. Next, click Save located in the lower right corner.
Note: You will need to log out and then log back in to make sure the preferences are set.
Click Utilities.
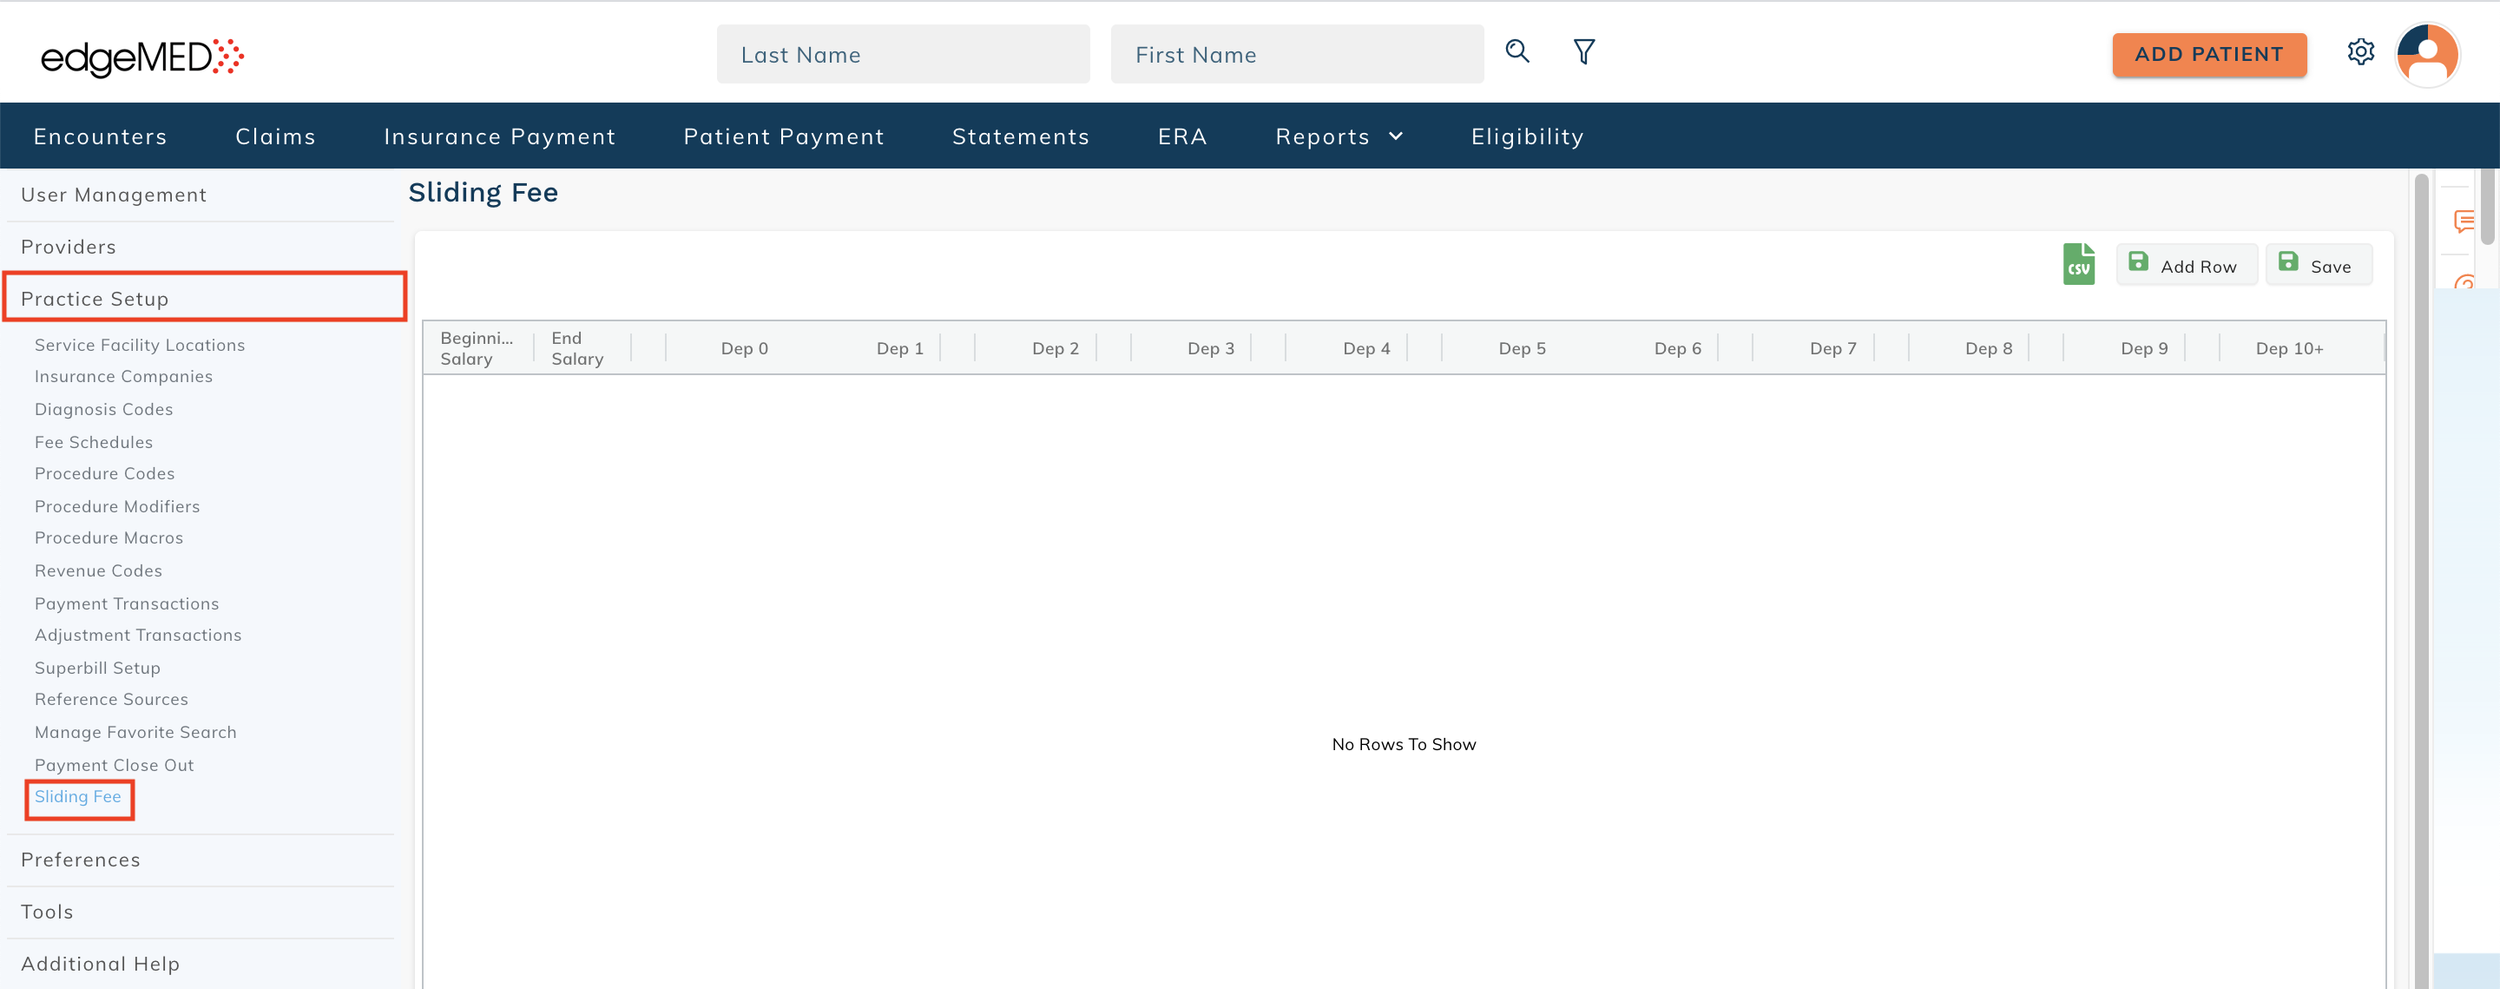
Click Practice Setup and Sliding Fee.
NOTE: This option will not appear unless you log out and log back in.

Manage the master sliding fee by entering patient salary ranges in the “Beginning Salary” and “End Salary” columns. Next, select the patient responsibility for each dependent column. Don’t forget to “Save” the settings.
Note: The patient responsibility can be entered as a dollar or percentage amount.
Setting Up Sliding Fee for a Patient
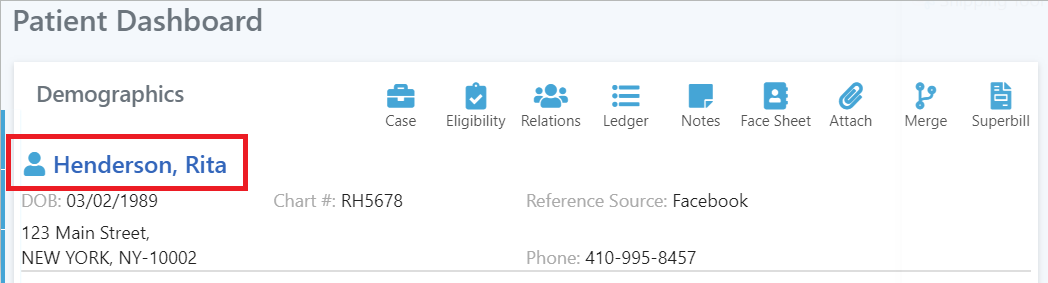
Navigate to the Patient Dashboard Demographics screen (click on the patient’s name in the dashboard) for applicable patients.

Select the “Sliding Fee” button to open the “Patient Sliding Fee” screen.
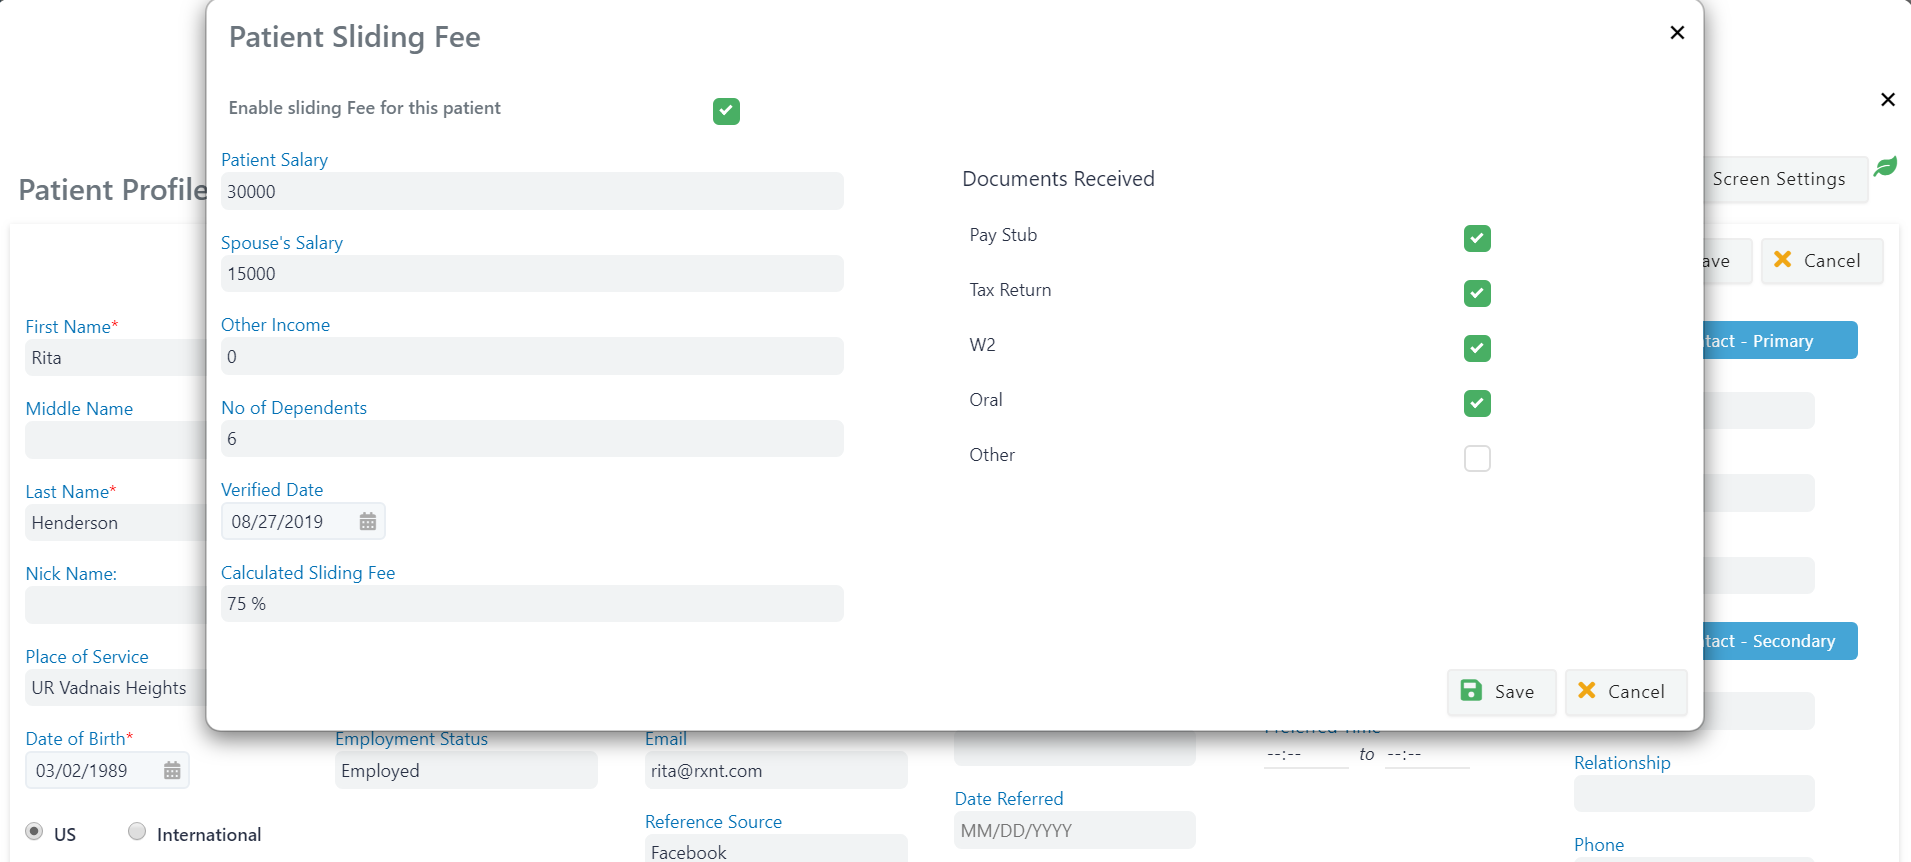
Note: Check "Enable sliding fee for this patient" at the top of this screen.
The information you’ll need includes:
Patient's Salary: How much the patient earns annually.
Spouse's Salary: How much the patient's spouse earns annually.
Other Income: Other income the patient receive in addition to their annual salary.
Note: These three amounts will be totalled in the sliding fee table row.
Number of Dependents: Number of people who are relying on the patient for support. (Ex: children/non-working spouse)
Note: The number of dependents is used to identify the sliding fee table column.
Verified Date: The day your practice received the documents that enabled you to verify that the patient qualifies for sliding fee.
Calculated Sliding Fee: Amount you are requiring the patient to pay, as a percentage or a dollar amount.
Documents Received: Work forms you have collected from the patient to verify the information needed in this screen.
Note: These forms let you accurately charge the patient’s applicable fee.
Automatic Write Off of Patient Balance When the Patient Does Not Have Insurance

Create patient encounters just as you would when using a standard fee schedule.
Note: In the encounter, the case type must be "Self Pay," for the sliding fee to work.
Once you have completed the necessary information, click “Save.” A pop-up will appear: "A zero dollar patient payment is created for the encounter..." as seen below.

You will now be able to apply sliding fee to all patients, even if they have insurance.
To get started, create patient encounters just as you would when using a standard fee. schedule.
In the example above, assume the patient has a 9% sliding fee.
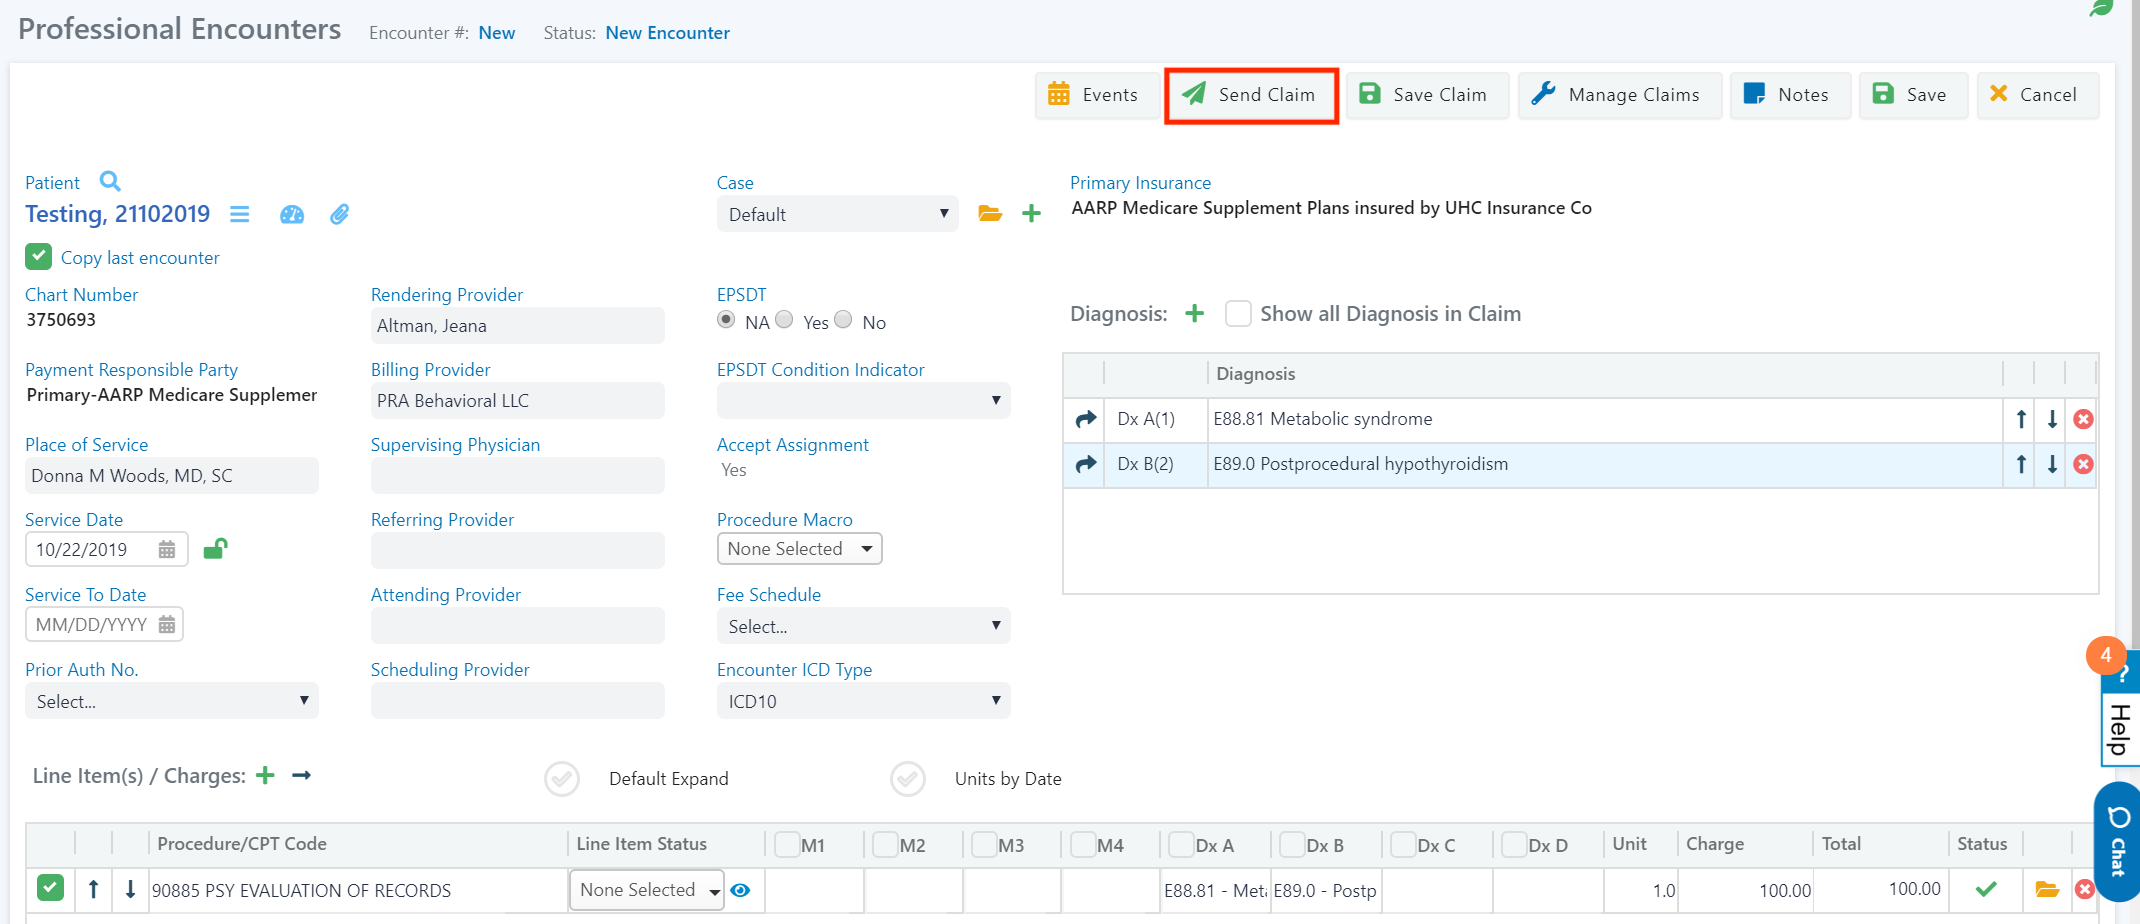
Also assume you charge them $100 in an encounter. Once you have completed the necessary information, click “Send Claim.”

Be sure to save the encounter. In this example, assume insurance covers $50. Continue to the I-Payment screen to post the insurance payment. Click "New Payment."


Here we are applying an insurance payment of $50 for this encounter. After you click "Save and Post", you can see in the encounter how much the patient still owes after insurance and after sliding fee has been applied.
Still need help? Contact us!