

edgeMED Help Center > Practice Management > Billing
Manage statement cycle.
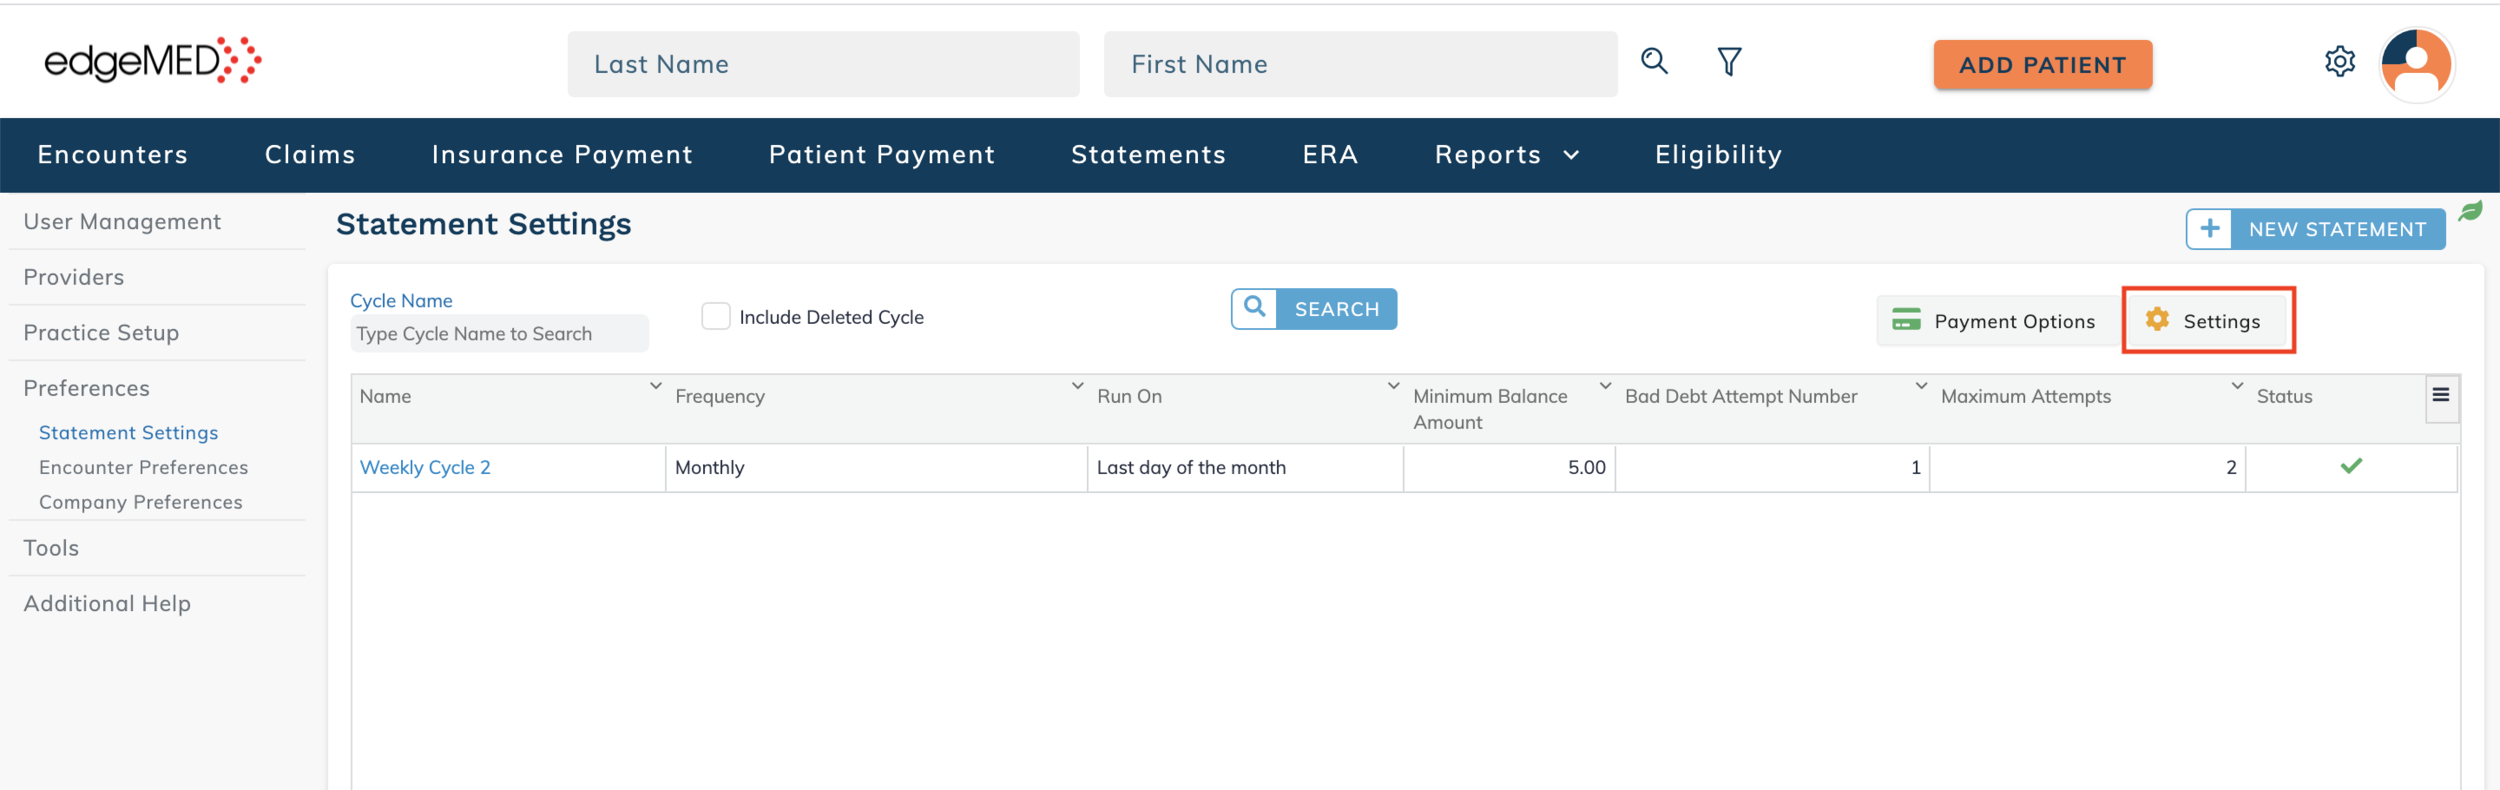
Statement Settings
Patient Statements will run based on parameters that you set up and manage.

Click Utilities icon at upper right corner.

Click Preferences and then Statement Settings. Next, click +New Statement in upper right corner.

Please fill out the statement details and click Save.
Statement Details Explained
Cycle Frequency: You can choose to have the statement generate on a weekly or monthly basis. If you choose to have your statements generate on a weekly basis, the same patient will NOT get another statement a week later. Each week, edgeMED will queue up those who have not received a statement in the last 30 days. While you may be running your statements weekly, patients are still only receiving a statement once a month.
Run on Date: If the cycle frequency is Weekly, you can choose to have it run on any day of the week or weekend. If it is monthly, you can choose the first day of the month, the last day of the month, and up to the 27th of the month.
Minimum Balance Amount: You can select the minimum balance the patient owes to generate a statement. For example, if you select $5, no statements will be generated for patients owing less than $5. This balance pertains to the overall balance on the patient account, not one date of service or one line item.
Maximum Attempts: You can choose how many statements you want the patient to receive before you start your in-house collections process. For example, if you set up five maximum attempts, as long as the patient is paying consistently, their cycle will go back to one. If the patient pays after their third statement, their cycle goes back to 1. Maximum attempts applies when the patient is not paying at all.
Bad Debt Attempt: You can decide the number of statements that trigger payment delinquency. This alerts the billing office so you are aware a patient has not paid and you can decide the next action.
Administrative Fee: You can add a fee to the statement to cover additional costs. For example, if you want to recoup the cost of mailing out multiple statements, you could add the fee here.
Message Line: Adding a custom message for patients.
Payment Options

From the Statement Settings page, click Payment Options.

Select the correct options you would like and click Save.
Click Settings.

Click on the desired statement preference settings and click Save.
Sending Statements
Once the statement cycle runs, the patient statements will be ready to be printed, mailed manually, or sent to the clearinghouse.
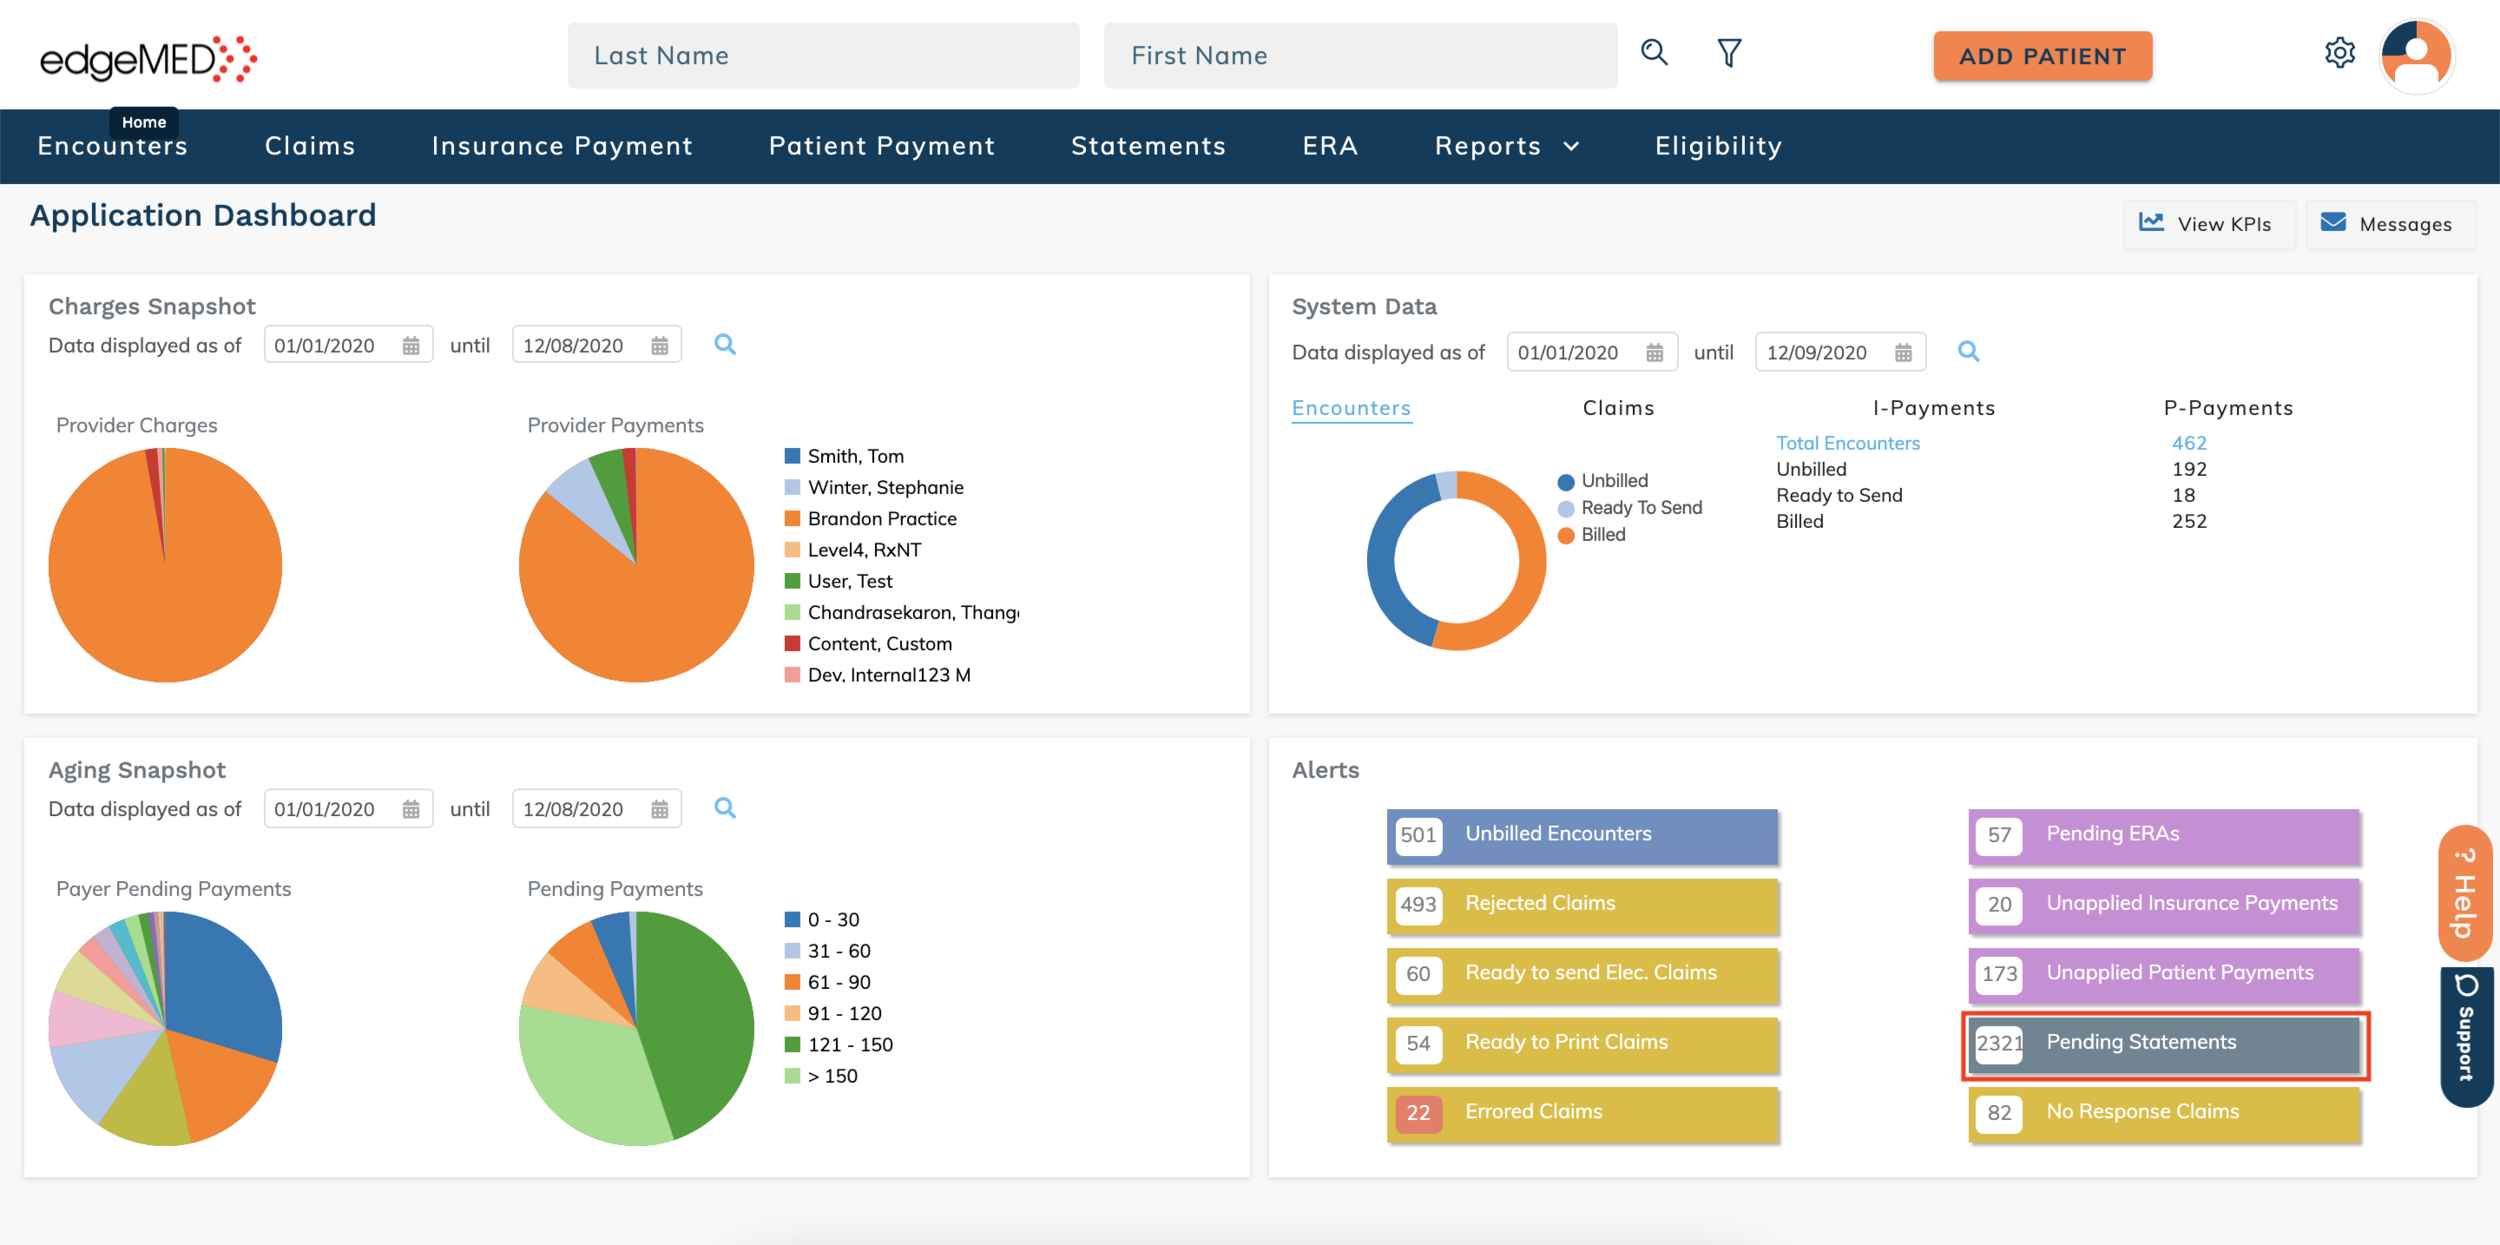
On the billing dashboard, click Pending Statements.

Choose how you want statements printed: in-house or via a printing service. Select the appropriate statements and click Send to Printing Service or Print Selected.

A patient statement will be sent to the patient's Guarantor.