

edgeMED Help Center > Practice Management > Billing
Add and update patient insurance.
Add Insurance from the Patient Dashboard

Search for the patient to update and navigate to the patient dashboard in the Scheduler or Billing section.
If no cases or insurance have been added for the patient, the Case icon will be highlighted in red. Click Case and proceed to add a new case (section below).

If there is already one or more cases for the patient, the Case icon will appear blue. Click Case to launch the list of patient cases and determine if a new case is needed.
Add Insurance from an Appointment in Scheduler

Patient cases can be updated from an appointment in the Scheduler. Select the appointment from the calendar.

Click the Case icon to view the patient's cases.

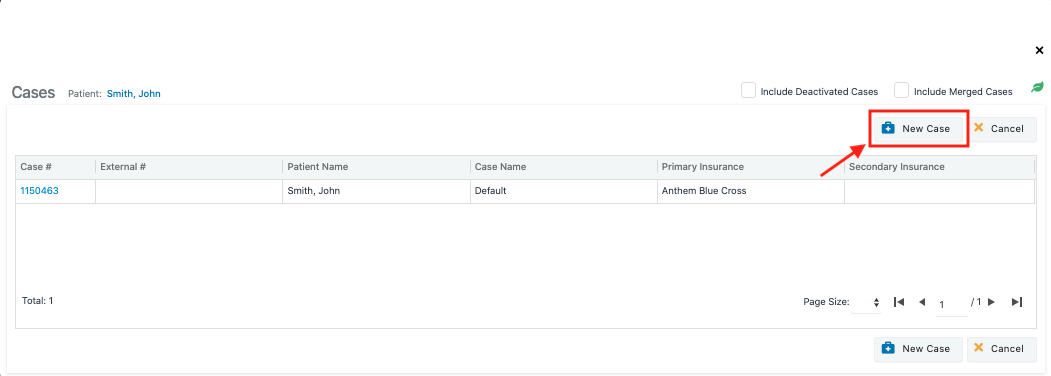
If no cases or insurance have been added for the patient, this area will be blank. Click New Case and proceed to add a new case (see section below).

If there is already one or more cases for the patient, they will be listed in this area. Before adding a new case, determine if a one is needed.
Add Insurance from an Encounter in Billing

Patient cases can be updated from an encounter in Billing. If no cases or insurance have been added for the patient, the Case dropdown will be empty.

Click the green + and proceed to add a new case.
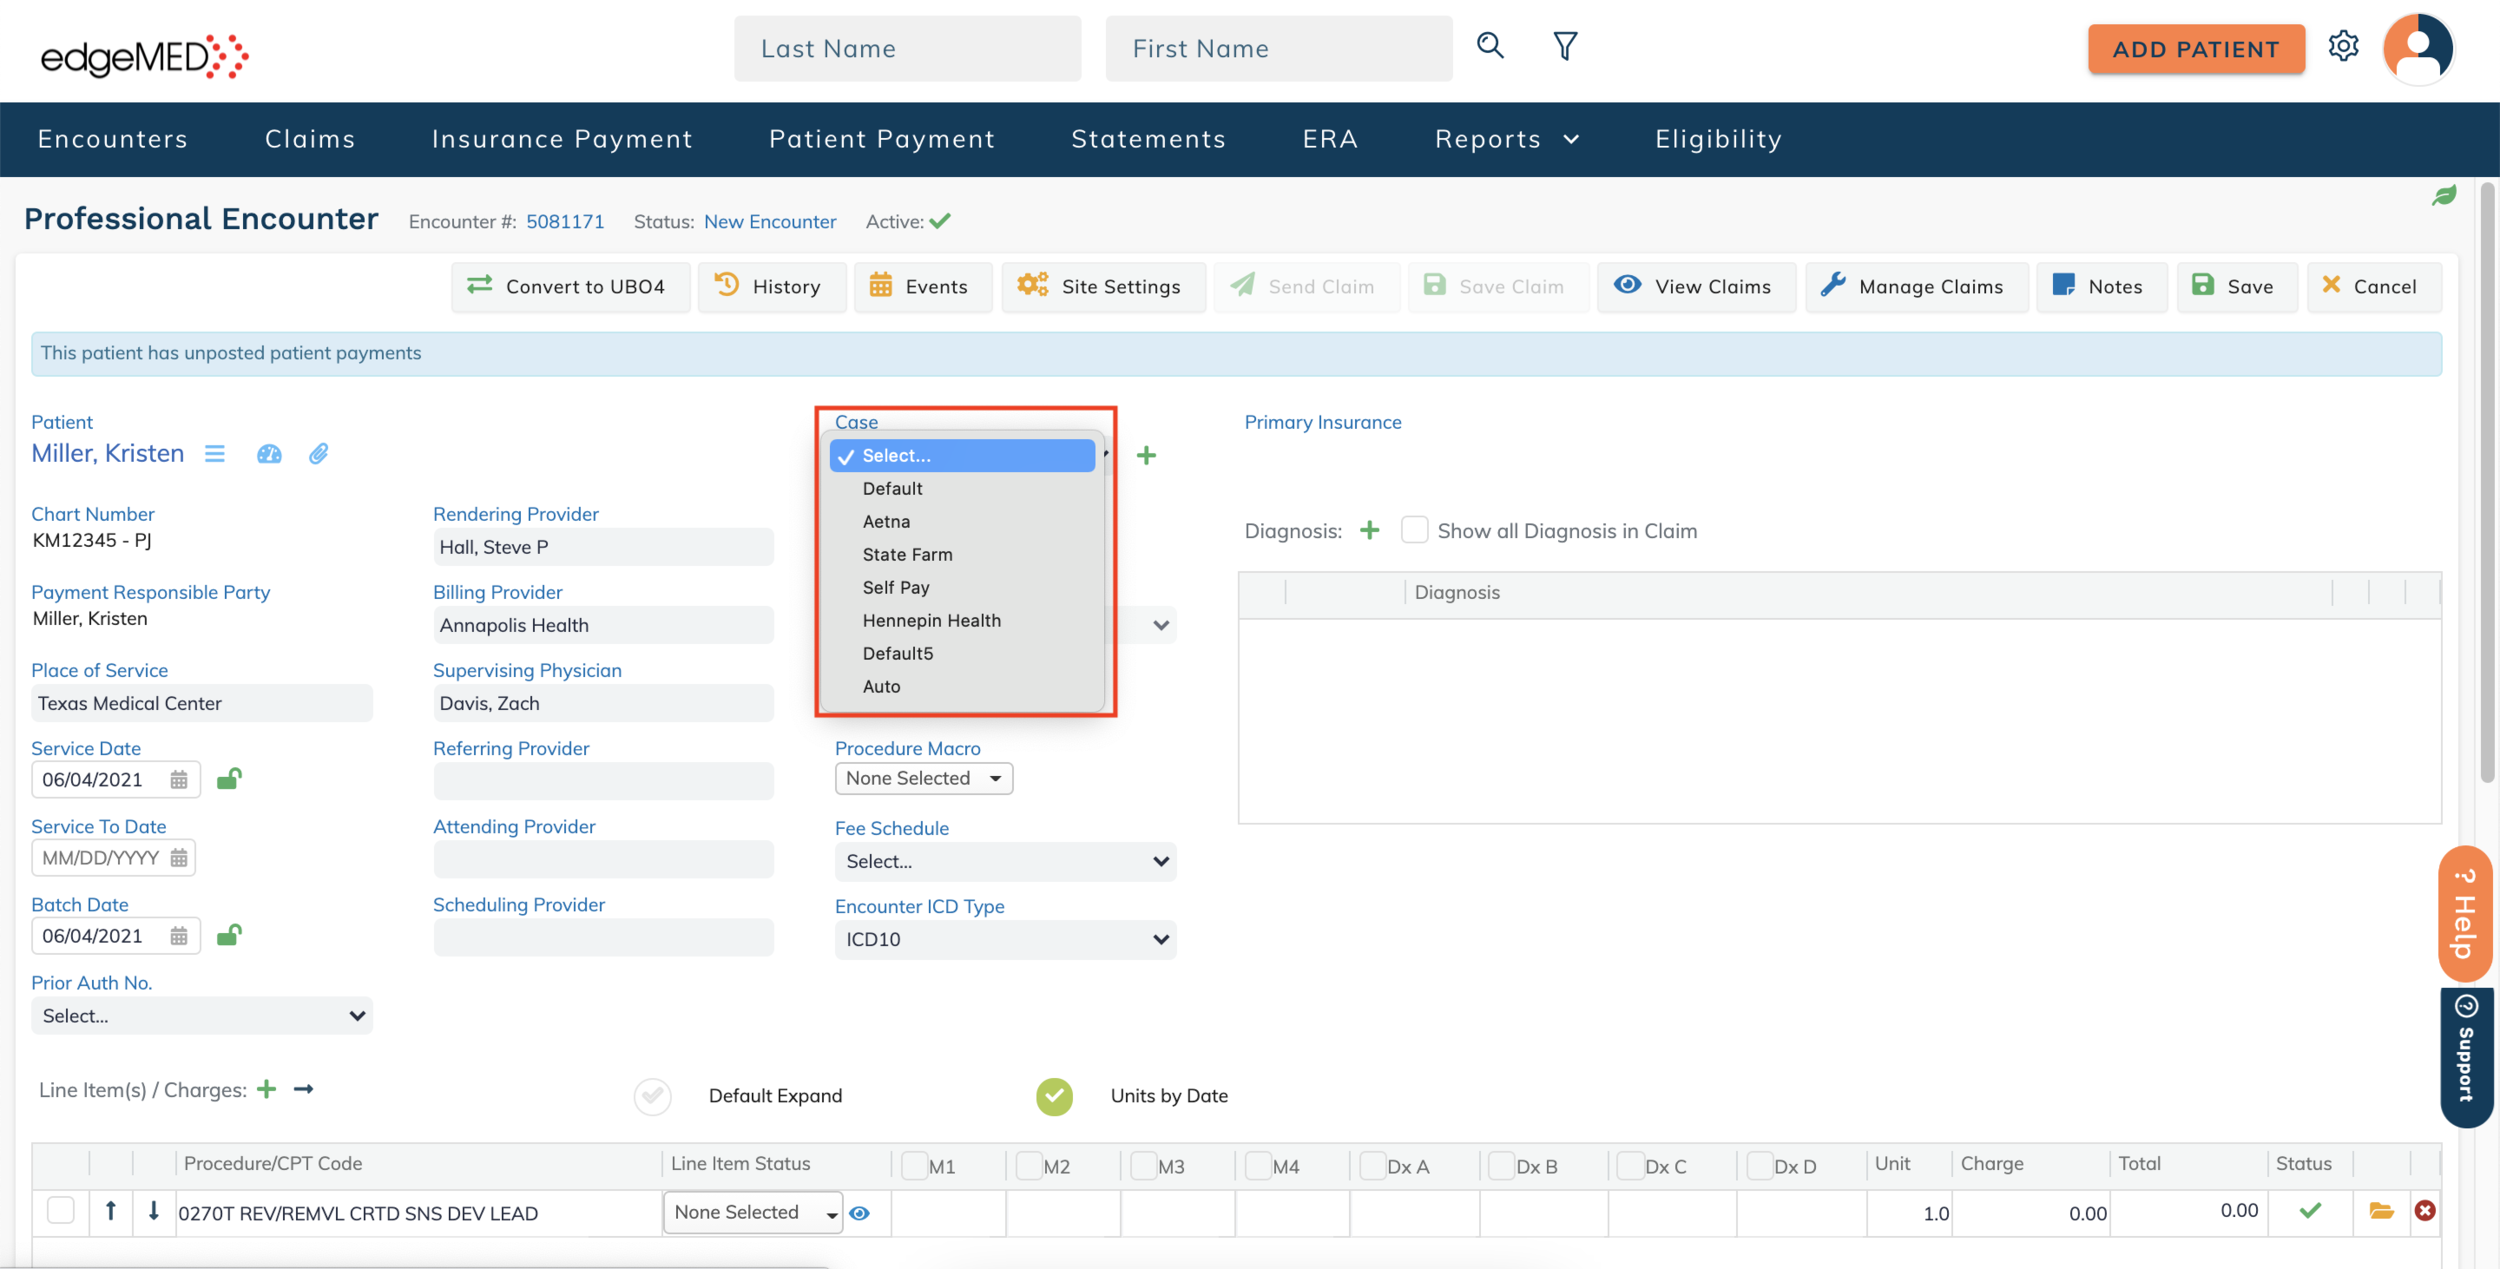
If there are one or more cases for the patient, the Case dropdown will list the patient cases. Before adding a new case, determine if one is needed.
When to Add a New Case
Cases can be thought of as types of insurance that a claim might be submitted to. Typical case types are as follows:
Patient self-pay (no insurance)
Health insurance
Employment
Abuse
Accident


If the patient already has a case of the type you need, either click the Case # (if you are in the patient dashboard or in a Scheduler appointment) or select the case and click the Folder icon (if you are in a Billing encounter) and proceed to update an existing case.
If a new case is needed, either click New Case (if you are in the patient dashboard or in a Scheduler appointment) or click the green + (if you are in a Billing encounter) and proceed to add a new case.
Add a New Case

Choose the Case Type from the dropdown menu.

Add a Case Name and Description. edgeMED recommends naming the case based on the type of case and related condition (e.g., regular health insurance, auto accident, self-pay, etc.) to help find the case easily when creating claims for the patient. If your practice doesn't process claims related to specific conditions, you can name the health insurance claim "Default" instead.

Enter details for the patient's condition, if applicable. These are used to indicate an auto accident case, an employment case (worker's compensation), or another type of accident.

Enter referring provider information, if it's applicable to this case only (for example, a lawyer who has referred a patient for an auto accident). If the referring provider relates to the patient in general, or to more than one case, add them to the patient demographics.
Update an Existing Case
Term an Existing Insurance Policy

If the patient's insurance is changing (for example, if they have changed employers), enter a To Date for the insurance that will be discontinued.
Add New Insurance

Click + Add Payer to add insurance to the case.

Choose the Subscriber from the dropdown. If you need to add a different subscriber, refer to the section add patient relations and/or case dates.

Choose the appropriate Payer from the dropdown list. Typing in the payer area will filter the list.

Set the payer Priority. The priority will automatically default to the next available, but this can be changed using the dropdown.

Enter the Policy No (number), Group No (number; if applicable), From Date, and Copay (if applicable) for the insurance.
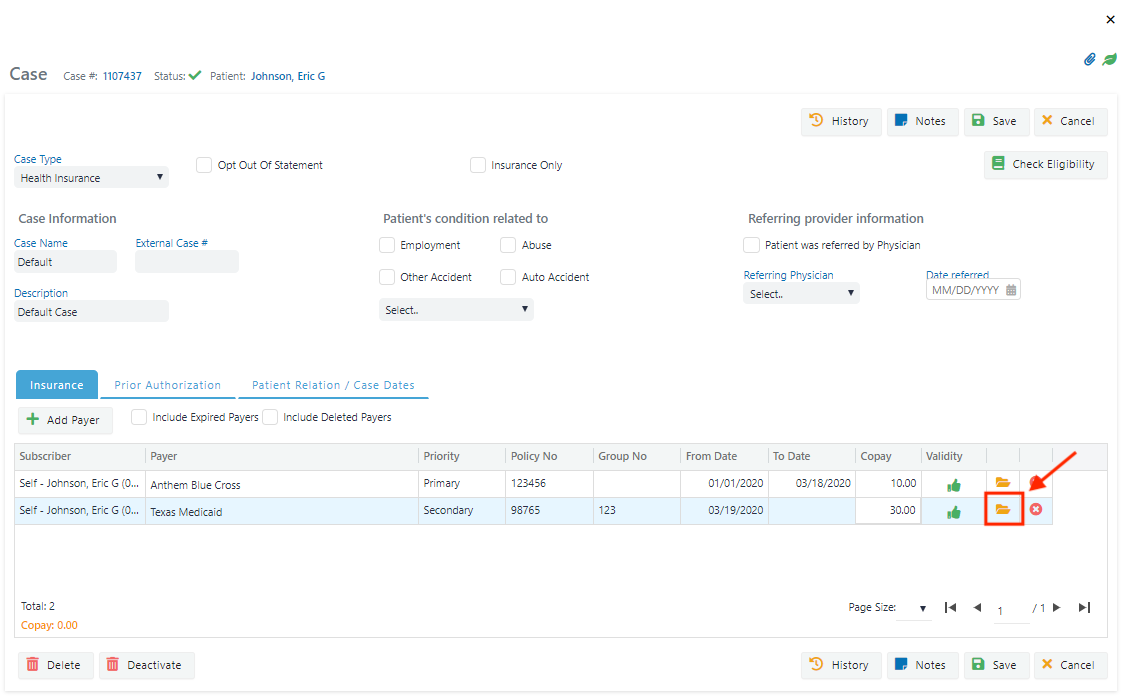
Some payers require additional information (e.g., Medicare secondary). Click the Folder icon to open additional payer details. Add any additional payer details and click Save.
Add Prior Authorization (if applicable)

If you have obtained prior authorization from a payer for a certain procedure, click Prior Authorization to add it to the case and monitor it in edgeMED.

Click + Add Prior Auth.

Set the prior authorization by Units or Visits using the checkboxes.

Enter a Prior Auth Name (for example, "Chiropractor Visits" or "Chemo Units") and add the Prior Auth No.

Select the Payer for the prior authorization. This field can be left blank but may result in visits or units being "double counted" if a prior authorization claim is sent to primary and secondary insurance.

Add the From Date and To Date. These are the dates that the prior authorization is valid for. The prior authorization will not be available to link to an encounter with a service date outside of this range. The From Date will default to the current date, but can be adjusted if needed.
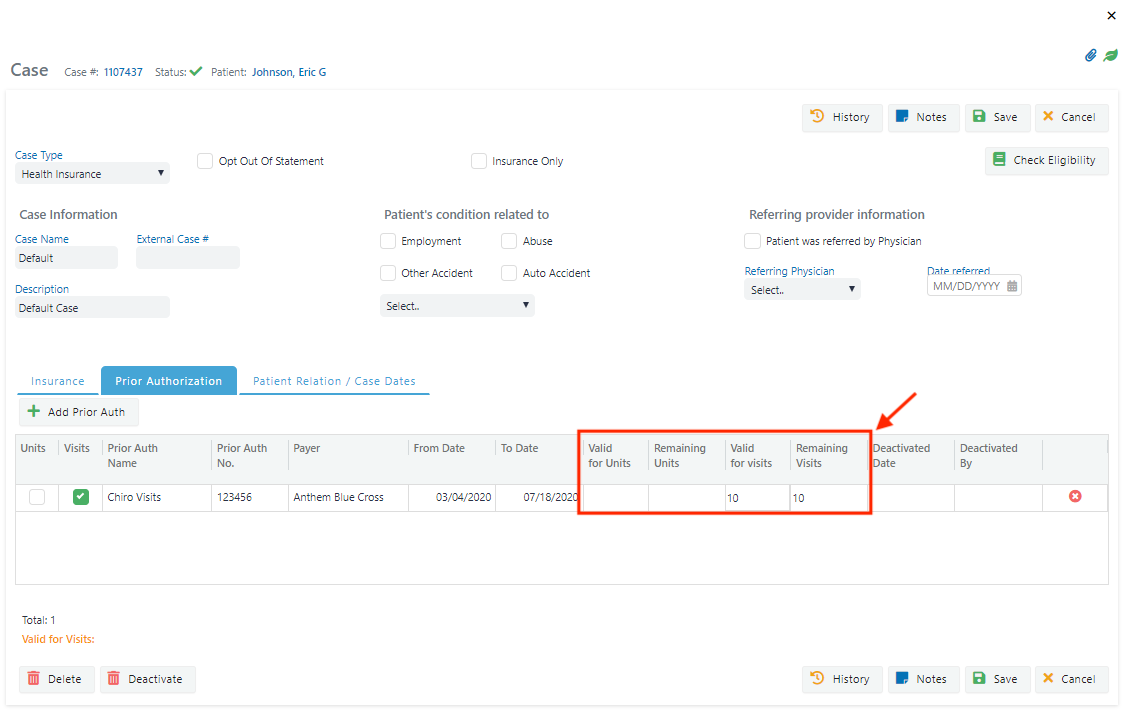
Add the number of units or visits that have received prior authorization in the Valid for Units or Valid for visits area. The remaining units or visits will automatically populate and will count down as claims are sent under the prior authorization.
Add Patient Relations and/or Case Dates (if applicable)
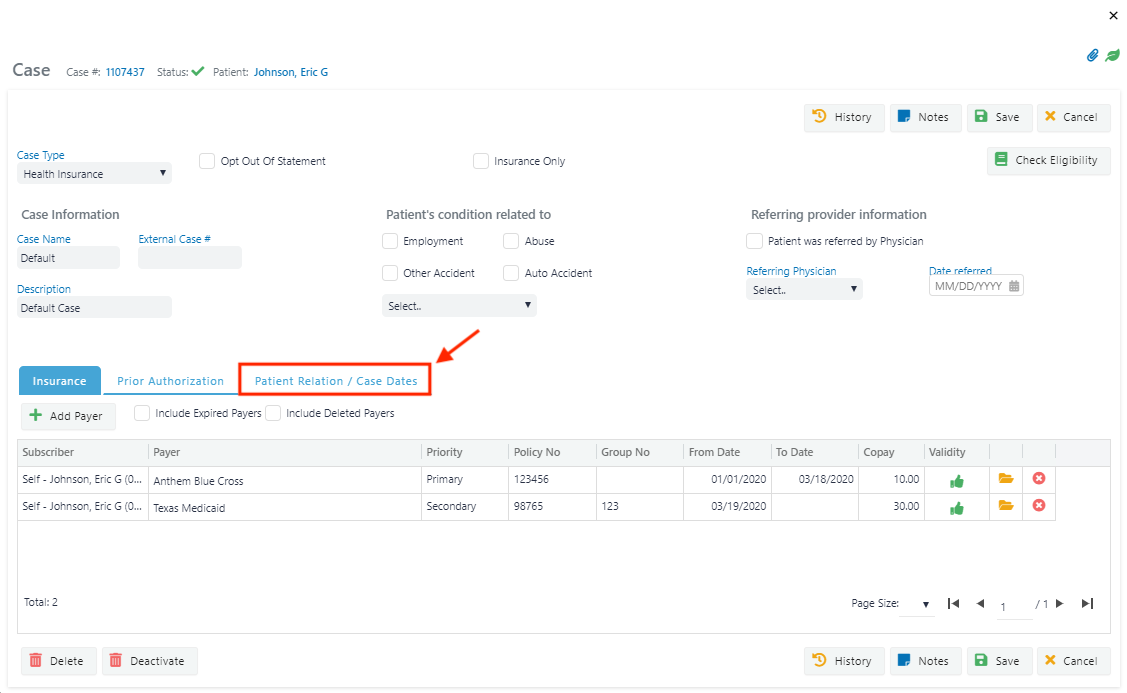
To add a subscriber or guarantor to the case that is different from the patient or to add important case dates, click Patient Relation/Case Dates.

Click + after Patient Relations to add a new guarantor or subscriber.

Click Search Subscriber/Guarantor or Search Patient to add the patient relation from a patient or relation that is already in the system.

Add a new patient relation by entering the basic information for the individual. Required fields include Relationship, First Name, Last Name, Date of Birth, Address, Zip, City, State, Sex, and Phone Number. Click Save to add the relation.

Use the Subscriber and Guarantor checkboxes to update the subscriber(s) and guarantors for the case. The subscriber is the policyholder for a particular insurance. The Guarantor is the individual who is responsible for remaining encounter balances that are not covered by insurances. A case can have multiple subscribers, but can only have one guarantor. The guarantor is typically only different from the patient if the patient is a minor.
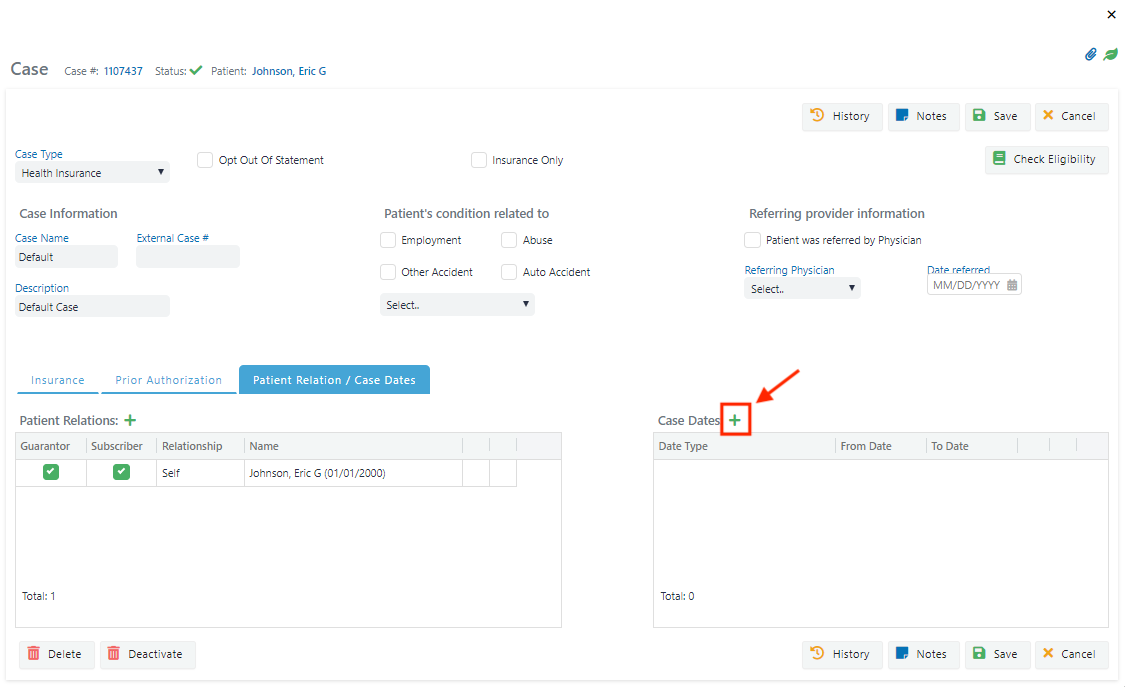
Case dates are typically required for cases related to accidents or worker's compensation, but they may also be necessary for some regular health insurance cases. To add a case date, click + after Case Dates.

Choose the Date Type from the dropdown.

Add the From Date and/or To Date for the case date.