

edgeMED Help Center > Electronic Health Records > EHR
Patient intake forms.
About Patient Intake Forms
When you use patient intake forms with our software, your patient documents are automatically saved to the Patient Dashboard in the documents section. Your front desk and records staff no longer need to manually scan and upload intake documents to the patient's chart. We are doing the work for you!
Our intake forms are fully customizable and include a number of pre-built components as well as optional custom components. This means that you will always be able to capture the important information that you need for your patients. The exact type and arrangement of the intake form options are completely up to you! Using intake forms with our system allows your practice to provide patients with these documents as soon as they are scheduled for an appointment. Since they receive them electronically as soon as you send them, patients no longer have to wait until they arrive at the office to fill out paperwork, eliminating schedule delays.

Access Intake Form Management
Login and select Intake Form Management from Utilities.
Create a New Intake Form
Information in the Medical History plugin will automatically pull from the information in the PFSH section under Medical History.

Click + Intake Form.

Choose Form Components
Add prebuilt components to your intake form by dragging them from the Prebuilt components list to the Selected components list. Prebuilt components are for standard patient demographics and insurance fields.
Click here to see the list of available prebuilt components
- First name
- Middle name
- Last name
- Preferred name
- Date of birth
- Patient sex
- Patient address
- Preferred phone
- Home phone
- Cell phone
- Work phone
- Other phone
- Race
- Ethnicity
- Preferred language
- SSN
- Sexual orientation
- Gender identity
- Marital status
- Employment status
- Preferred communication method
- Time zone
- Emergency contact
- Primary insurance
- Secondary insurance

Add a custom component by entering a name or question to display for the patient. Then choose a component type and click Add.
Click here to see the list of available custom components
- Header
- Free text box
- Free text area
- Phone number
- Date picker
- Number
- Radio select
- Single select dropdown
- Multi select dropdown
- Address
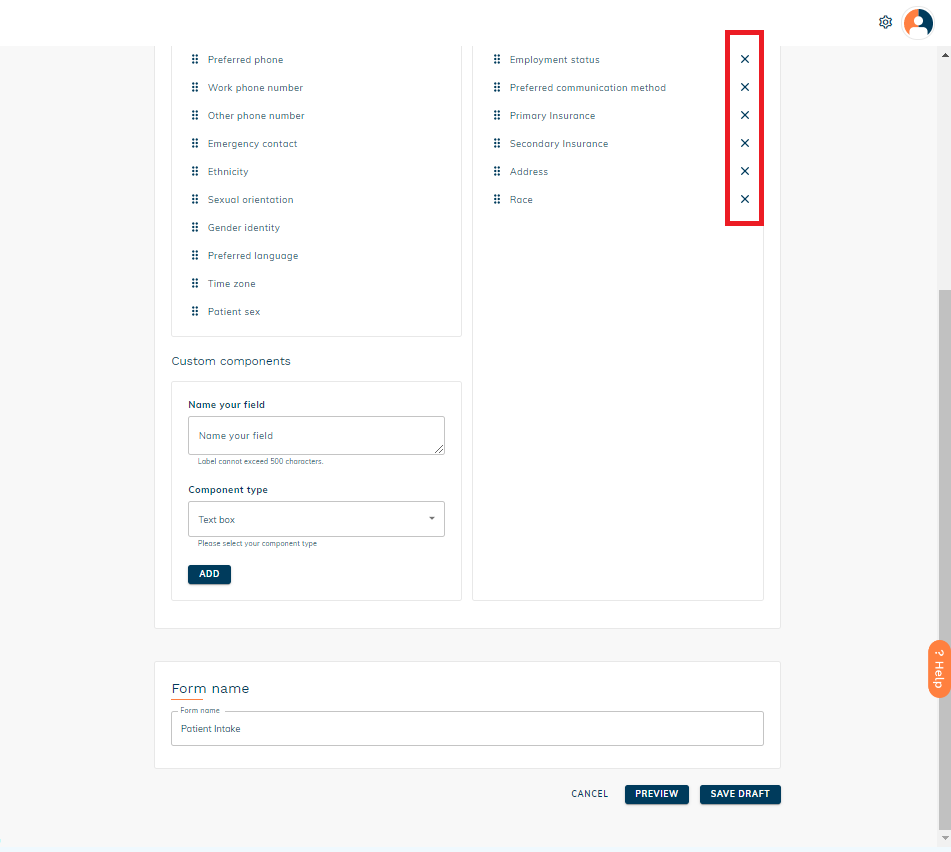
Rearrange components by clicking on the component and dragging it to the location where you want it to appear. Remove components from the selected list by clicking x icon to the right of the component name.
Next, Enter a Name for your intake form (located at bottom of screen).
When done, click Preview to see how the intake form will appear to patients.

Click Modify to return to the previous screen and continue editing your form. Click Save to create the intake form.

Save as Draft and Finish Later
If you aren't ready to complete an intake form you're working on, you have the option to save it as a "Draft" and finish setting it up later. To save a form as a draft, click Save Draft in the create intake form page or in the intake form preview.
Draft intake forms will appear in the intake form list with a Draft tag and can be completed by clicking on the edit icon.
Create a New Form from an Existing Intake Form

Navigate to the existing form in the list and click on the Duplicate icon. On the Create Form screen that follows, make any necessary changes or additions to the form components and update the form name. Then, Preview and Save the form as normal.
Deactivate an Intake Form

To deactivate an intake form, and prevent it from being sent to patients, click the Deactivate icon on the active form list. A confirmation message will appear. Click Deactivate.
The form will automatically move to the inactive list, and staff members and providers will no longer be able to send the form to patients. Patients who have already been sent this form, but haven't completed it yet, will still be able to complete the intake form.
Reactivate an Intake Form

To reactivate a form from the Inactive list, click the Reactivate icon on the inactive form list. A confirmation message will appear. Click Activate.
The form will automatically move to the active list, and the form will be available for staff and providers to send to patients.
Sending Intake Forms from Electronic Health Records

Click on the patient's Name to open the patient's profile.

Click Patient Forms.

Click Intake Forms. Next, select the checkbox for the intake forms you want to send to the patient and click Send.
Sending Intake Forms from Scheduler
Send intake forms when you create an appointment or when you are in the patient’s profile in Scheduler. Forgot to send intake forms while creating an appointment? You can also send intake forms from an existing appointment. In this section, we’ll show you how to send Intake forms from New Appointments, Existing Appointments, and from the Patient Profile.
To Send Intake Forms from New Appointments
Create an appointment.

Click the Patient Forms drop-down.

Select the intake forms to be sent to the patient. When done, click Save.
The intake forms will be sent to the patient’s portal.
The Last Sent Date is updated as soon as the forms are sent.
The Completed Date is updated as soon as the patient completes the form.
To Send Intake Forms from Existing Appointments

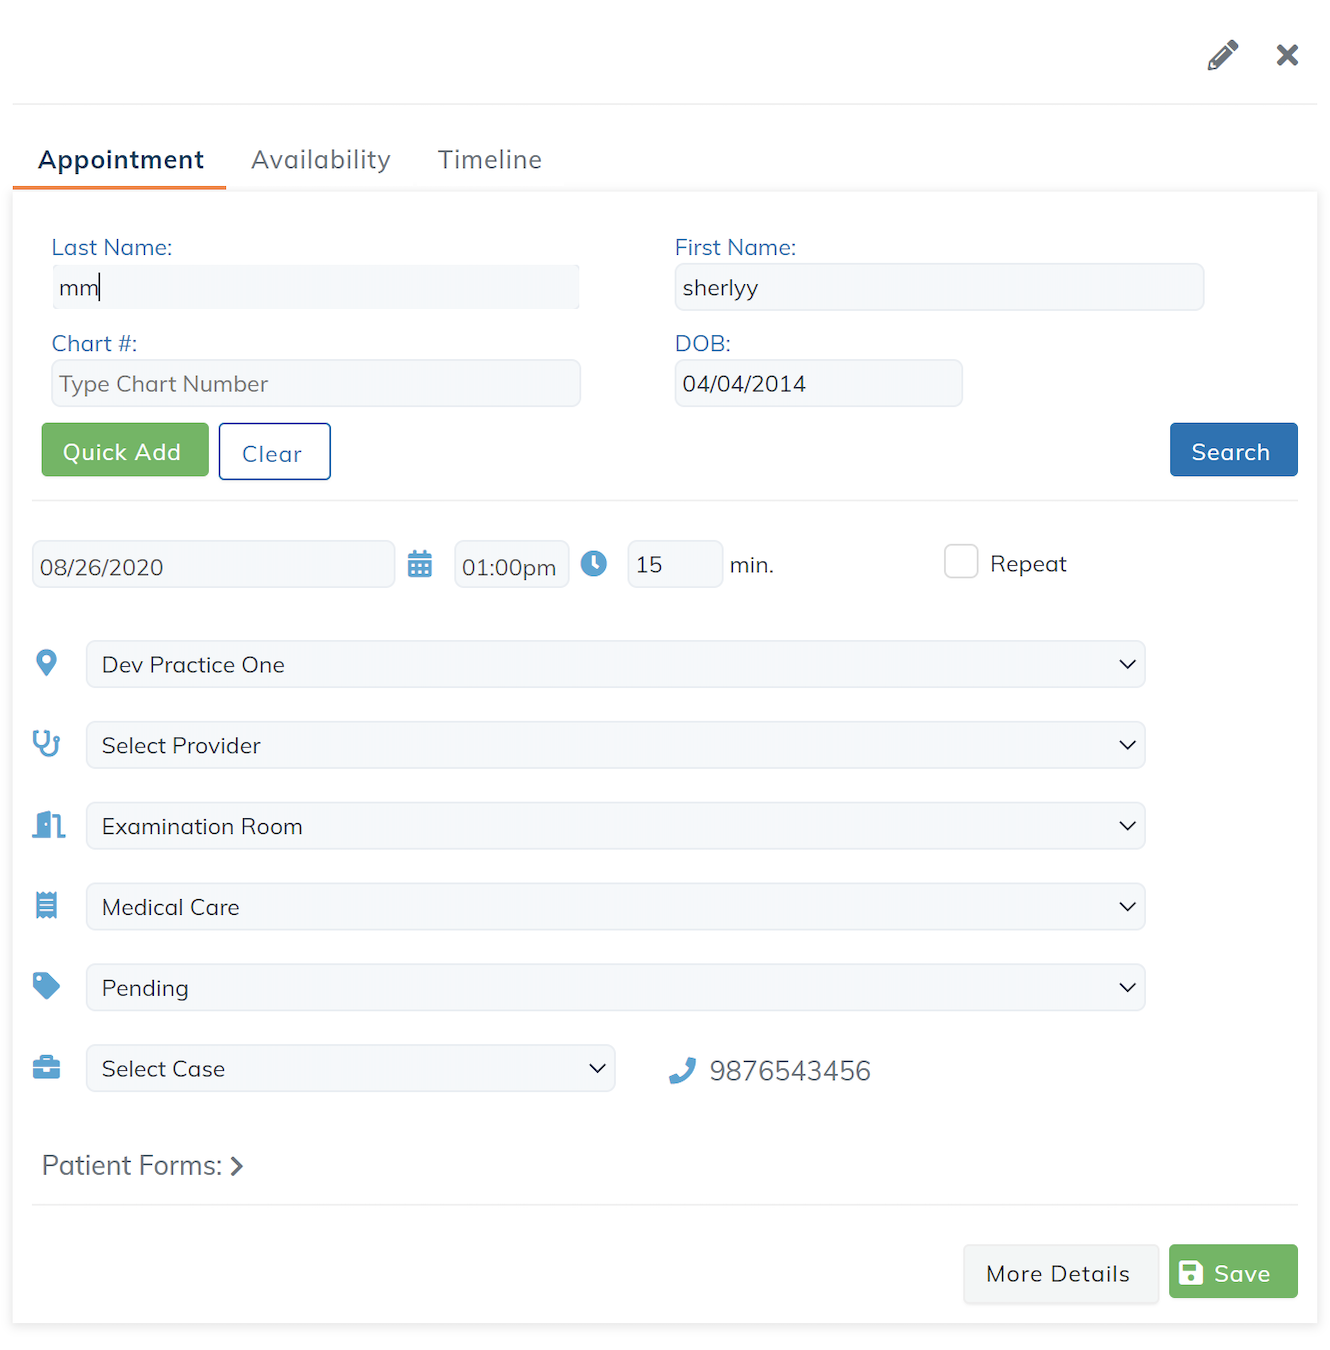
First, click on an existing appointment. Once an Appointment is selected from the Scheduler screen, this pop-up displays. Click on the Patient Forms drop-down.
Select the intake forms to be sent to the patient. When done, click Send. The intake forms will be sent to the patient’s portal.
To Send Intake Forms from the Patient Profile

First, navigate to the patient profile screen. Next, click Patient Forms.

Click the Intake Forms tab. Select the intake forms to be sent to the patient. When done, click Send. The intake forms will be sent to the patient’s portal.