

edgeMED Help Center > Electronic Health Records > eRx
Manage custom sigs for prescriptions.
Creating a New Custom Sig

Click Utilities icon in upper right corner.

Click Custom Sigs Management from within Medication Management.

Click Add Sig. Next, type in the Drug Name and click Search. A list of medications are displayed and you select the medication from the list.
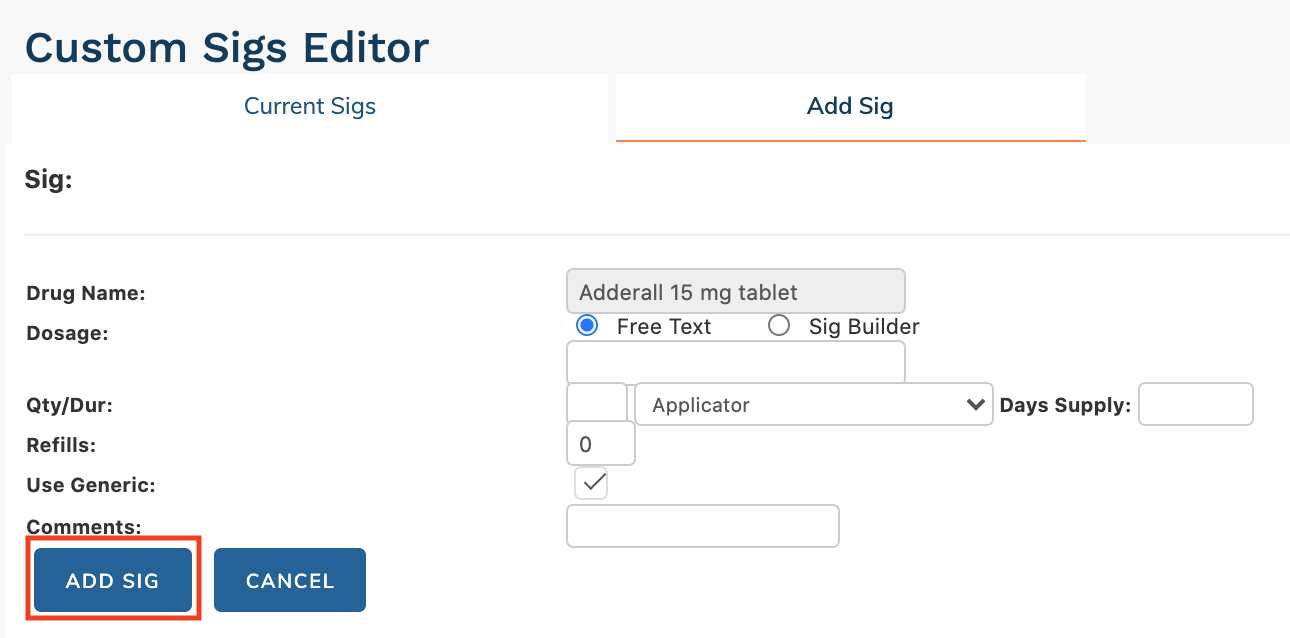
Enter the information needed for this medication. Then click Add Sig.
Editing an Existing Custom Sig

Click on the already existing Custom Sig that you wish to edit. The Custom Sig Editor will display. Make any desired changes and click Update Sig.
Saving Custom Sig While Writing a Prescription

Click Medications. Locate the Write Rx (search drug) field and type the drug name and click search.

Select the medication from the list.

Click Sig Builder. On this screen, you can also view custom sigs already in your account.

Enter the correct information and click Next.
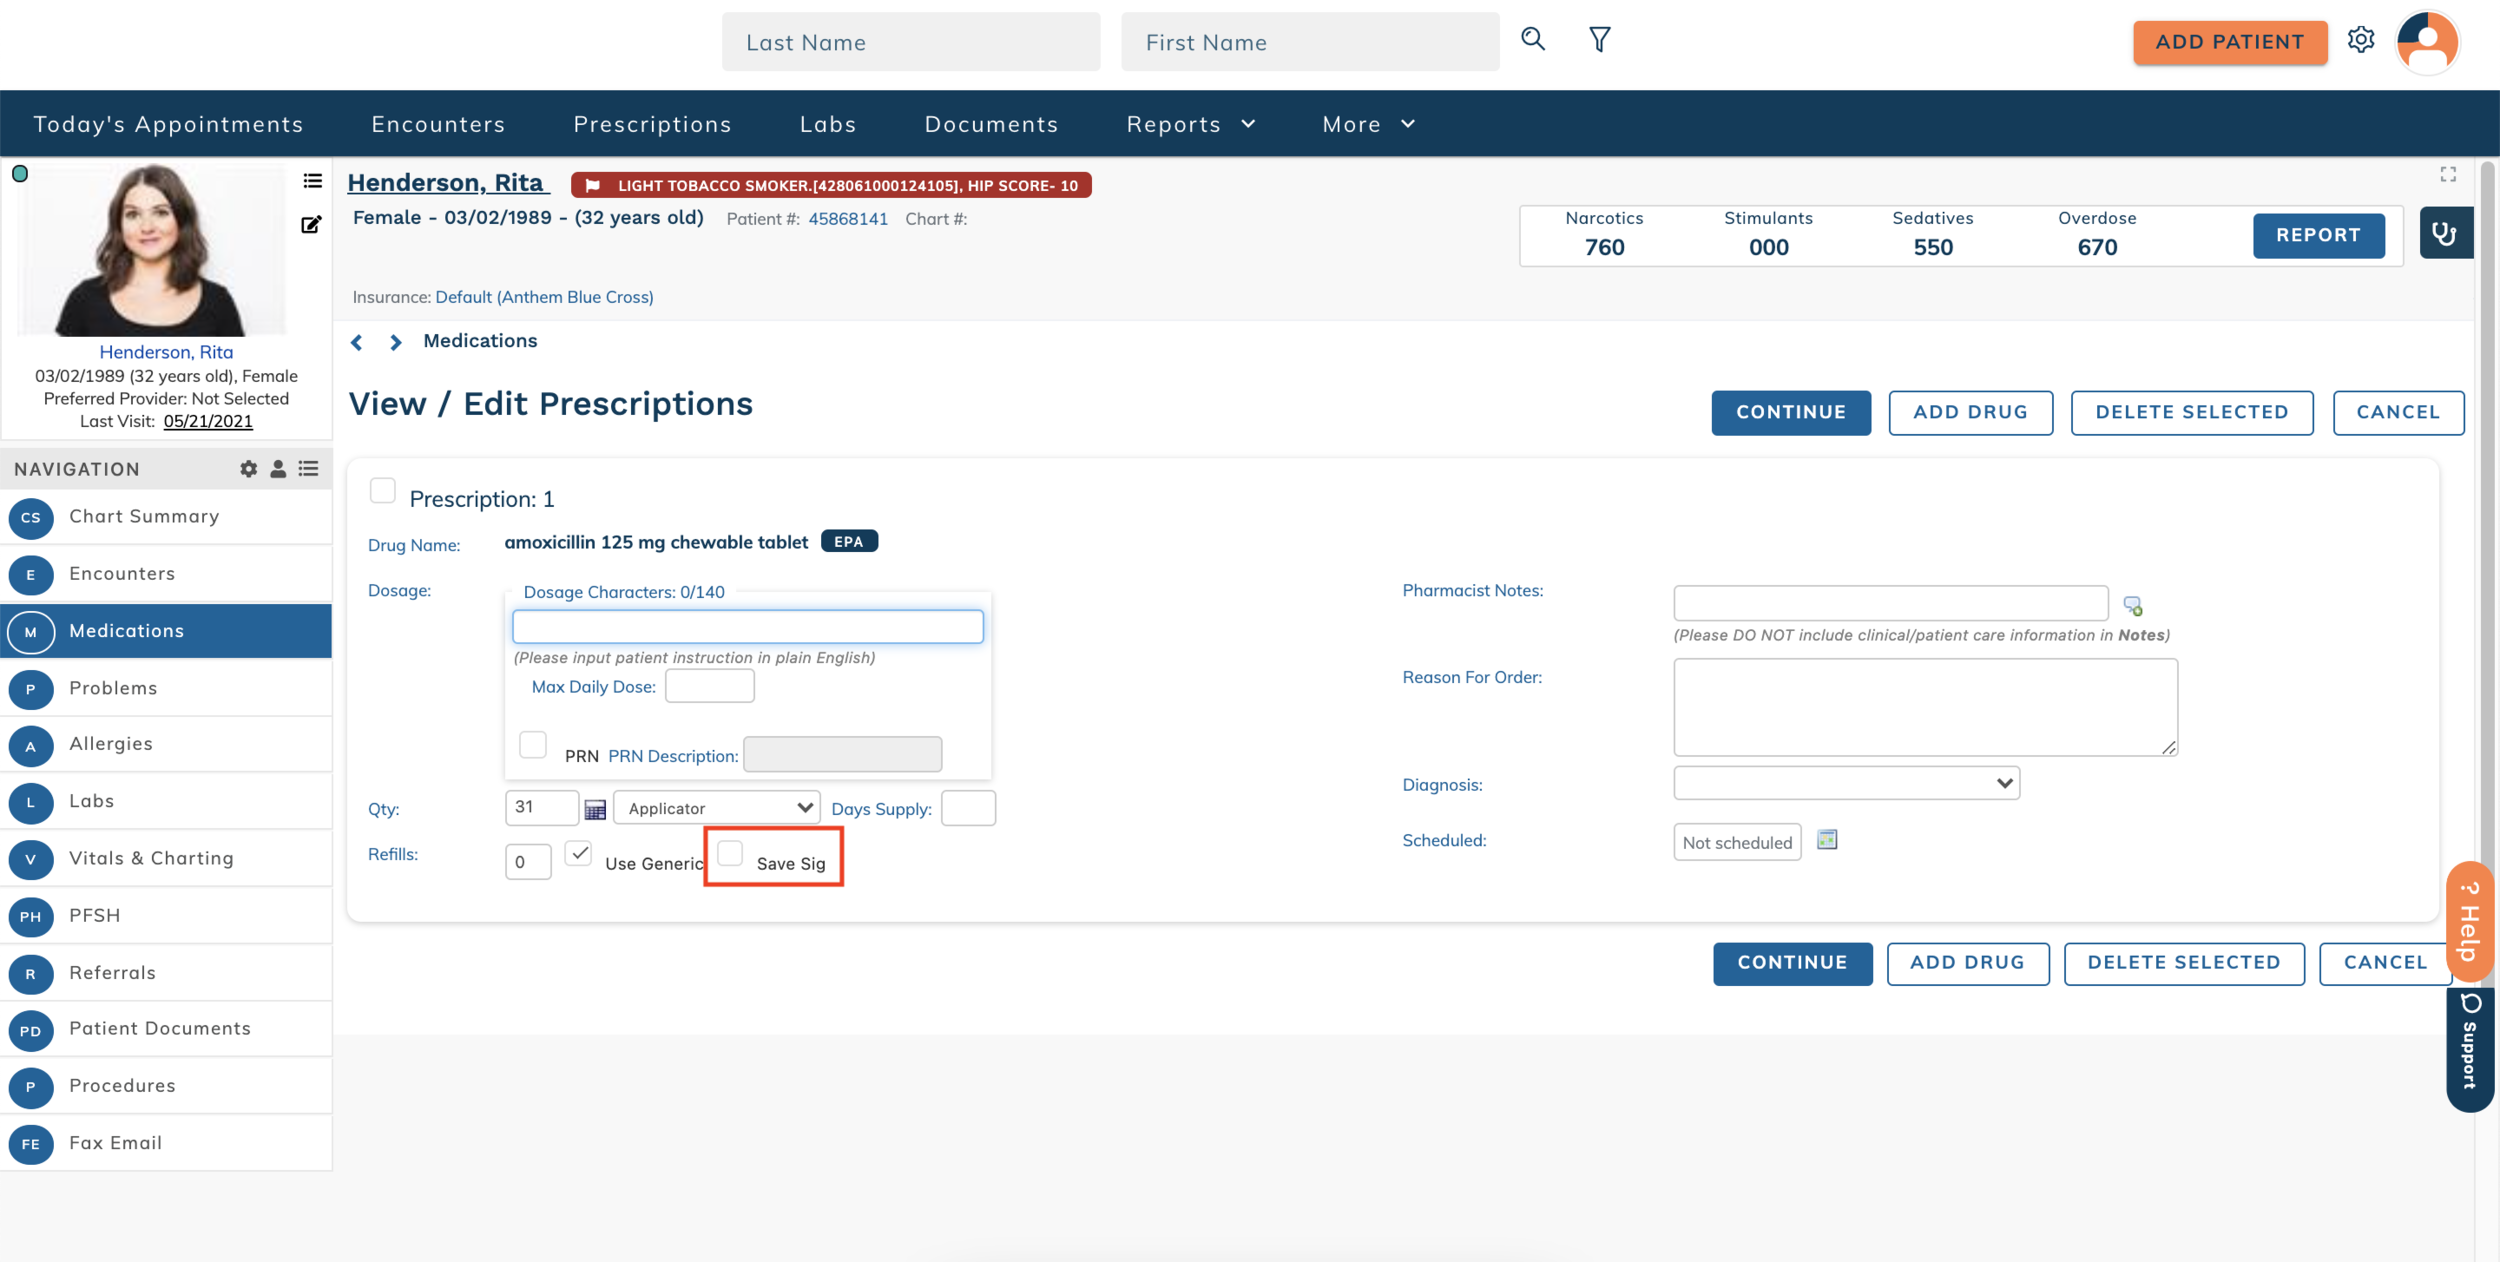
Check Save Sig and continue to write the prescription as normal. Now you have added this Sig to your custom sigs for future use.
Group Level Favorites
Clinical administrators have the ability to set custom sigs at the group level. In this section, we’ll show you how to add a new favorite and how to import an existing Sig.
Click Utilities icon in upper right corner. From the dropdown that displays, click Group Level Favorites within Clinical Admin Tools.
Add a New Favorite

Click Custom Sigs and Add Sig. Next, search for drug name and click Search.

Select the correct drug. On the following screen, enter Sig details and click Add Sig.
Import an Existing Sig
Click Utilities icon in upper right corner. From the dropdown that displays, click Custom Sigs Management from within Medication Management.

Click Custom Sigs and Import. You will then be shown a list of users from which you can import. Select the user you wish to import from.

Select all of the sigs you wish to import. Next, click Import to Group.